

How To Create A Matte Look In Lightroom
How To Edit Photos To Look Like Film In Lightroom And Lightroom Mobile
If you're the kind of person who loves the film aesthetic but doesn't have a film camera to shoot with, then learning how to edit photos to look like film is the perfect solution. With the help of Lightroom, you can edit your pictures to look like film with the help of a few sliders. Since this type of edit favors a softer, more muted look, the entire process can be done without any spot adjustments. So even if you're a complete beginner to editing in Lightroom, the tips outlined here will feel like a breeze!
You can edit your photos to look like film by first lifting the shadows and darks sliders to reduce the contrast. From there, use the white balance and tint sliders to favor a yellow-green hue to match a film-like appearance. To finalize the film effect, desaturate dominant colors with the HSL adjustment and add grain via the Effect Panel in Lightroom.
In this post, you'll learn how to make your photos look like film in Lightroom and Lightroom Mobile. Both processes are relatively similar but use a few different tools. Let's start things off by talking about getting that film look in the desktop version of Lightroom.
How To Edit Your Photos To Look Like Film In Lightroom
Although different types of film offer different looks to your photos, these steps will create the typical film-like edit you commonly see on social media. This effect is created by softening the photos' shadows and colors to make them look more faded. Lastly, with the help of some grain, you can add a more convincing film look to the edit!
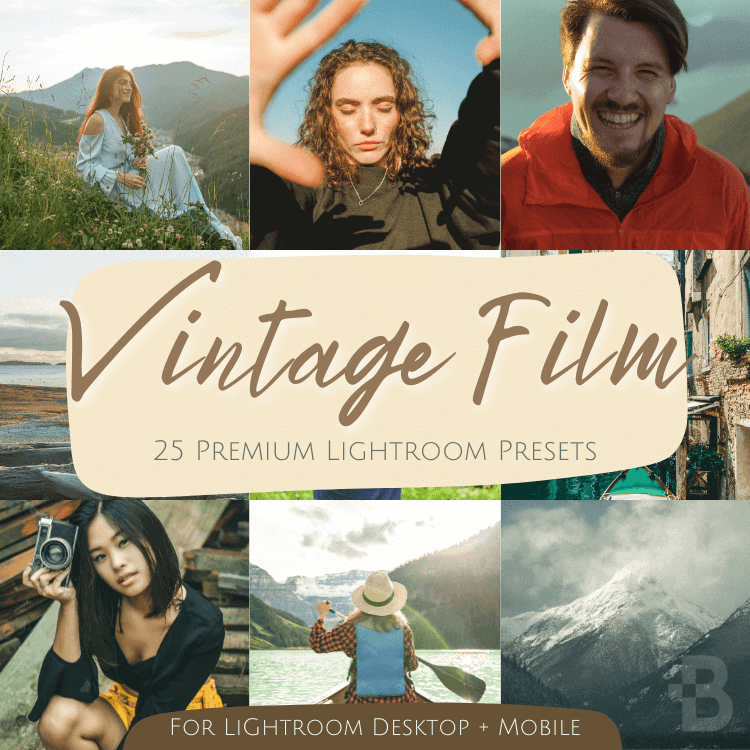
Now before we get into the steps, I created a Vintage Film Preset Collection that really speeds up this process. With this pack, you can skip all these steps and get the same result with one click! It comes with 25 presets for Lightroom and Lightroom Mobile so you can edit while at home or on the go. Right now you can get all 25 of these presets for just $8. Click here to check it out!
Step 1: Reduce The Contrast Of The Photo
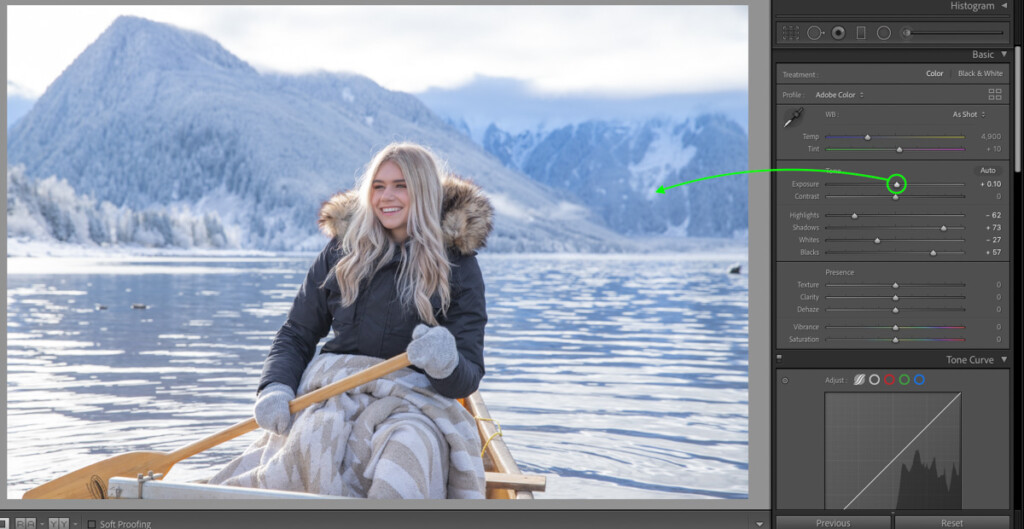
Within the Develop Module of Lightroom in the Basic Panel, start by lifting the photo's shadows and darks. This helps to soften the shadows and is an important starting point for the edit.
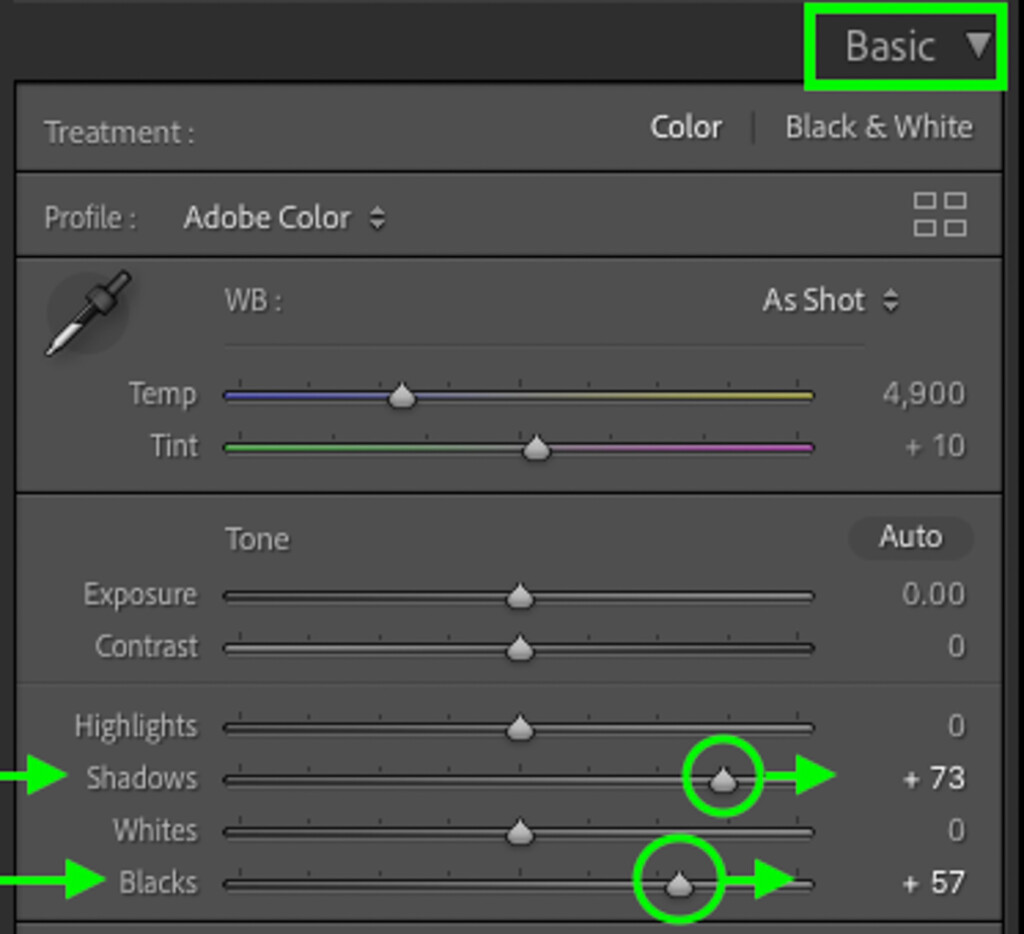
After lifting the shadows, bring down the whites and highlight sliders slightly to flatten the image further. Just remember to be sparing with how heavy of an adjustment you do here!

If your photo still appears slightly too dark, increase the exposure slider until your entire photo has a balanced exposure. This slider will only affect the photo's brightness while leaving the contrast adjustments you just made untouched.
Step 2: Adjust The White Balance & Tint To Favor A Yellow-Green
You'll find the White Balance (Temp) and Tint Sliders at the top of the Basic Panel. To give your photo a film-like feel, you want to favor a warmer green hue.
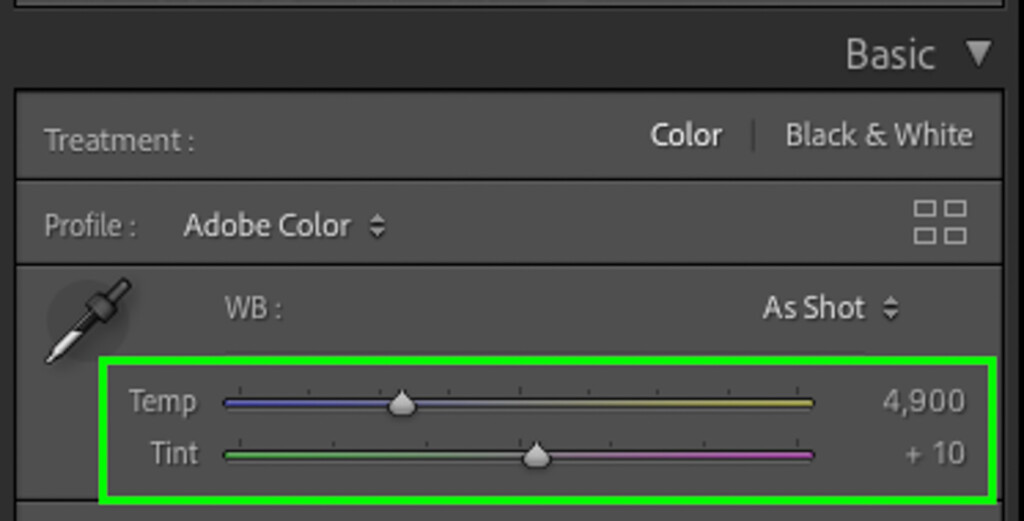
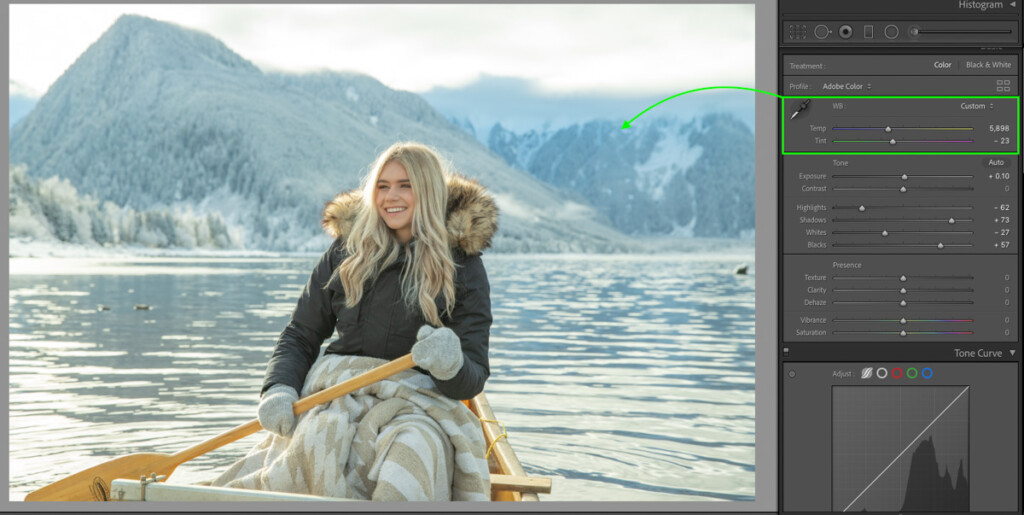
Start by adjustments the Temp slider to favor a warmer (more yellow) hue. By moving it to the right, the photo will become gradually more yellow.

Next, adjust the Tint slider to favor a green hue by moving it to the left. Once again, the further left you move this slider, the more intense the green will become.

Every photo will require slightly different white balance and tint adjustments. You want to make it look slightly noticeable without overwhelming the image with one hue or another. After this adjustment, your photo will be left with a more retro old-timey look.
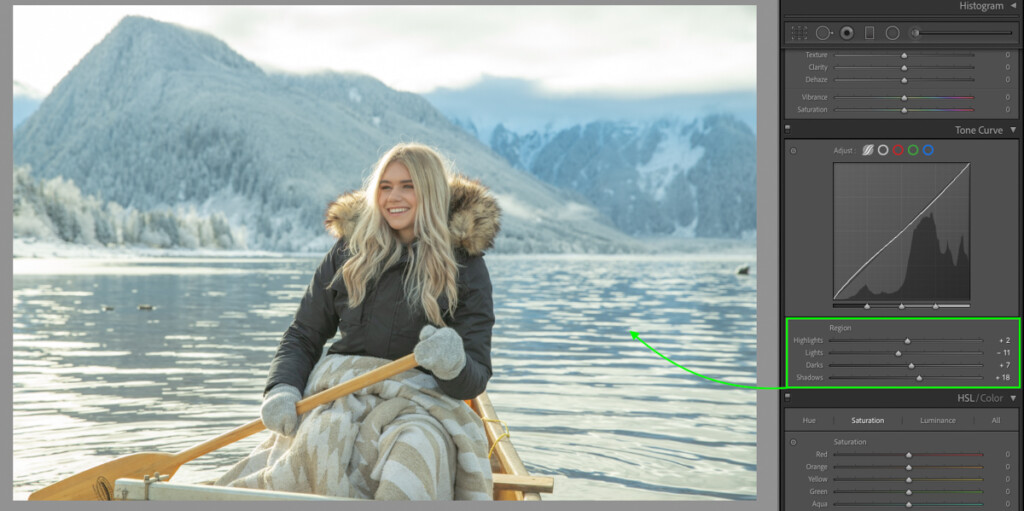
Step 3: Refine Your Contrast With The Tone Curve
Scrolling down to the Tone Curve adjustment, select the Region Curve for the most simplicity.
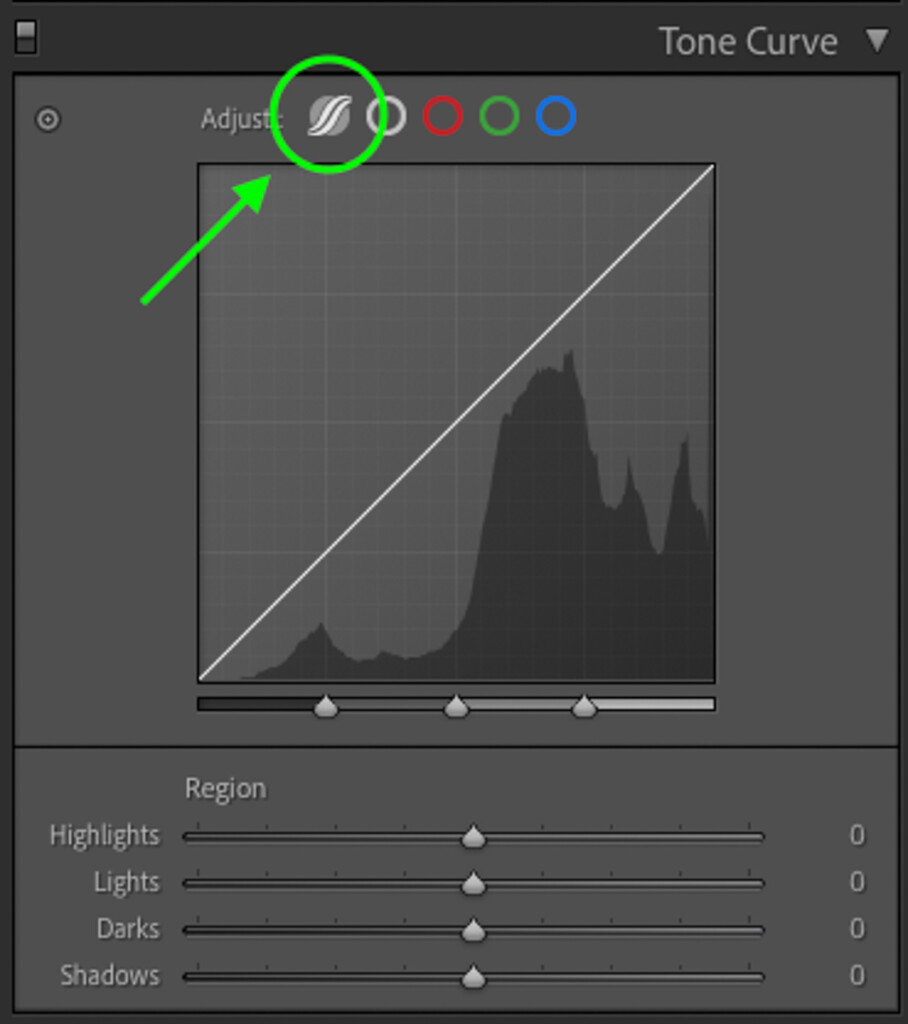
This adjustment is great for adding more creative contrast, but in terms of editing light film, you can further flatten the image. Start by lifting the shadows and darks sliders to see what looks you can create.

In some cases, your photo might look too flat (not enough contrast), so you can bring down the darks to help solve this problem.
Depending on the style you like, you can increase or decrease the highlights and lights sliders. Whenever I'm editing for this effect, I tend to boost the Tone Curve's highlights slightly.
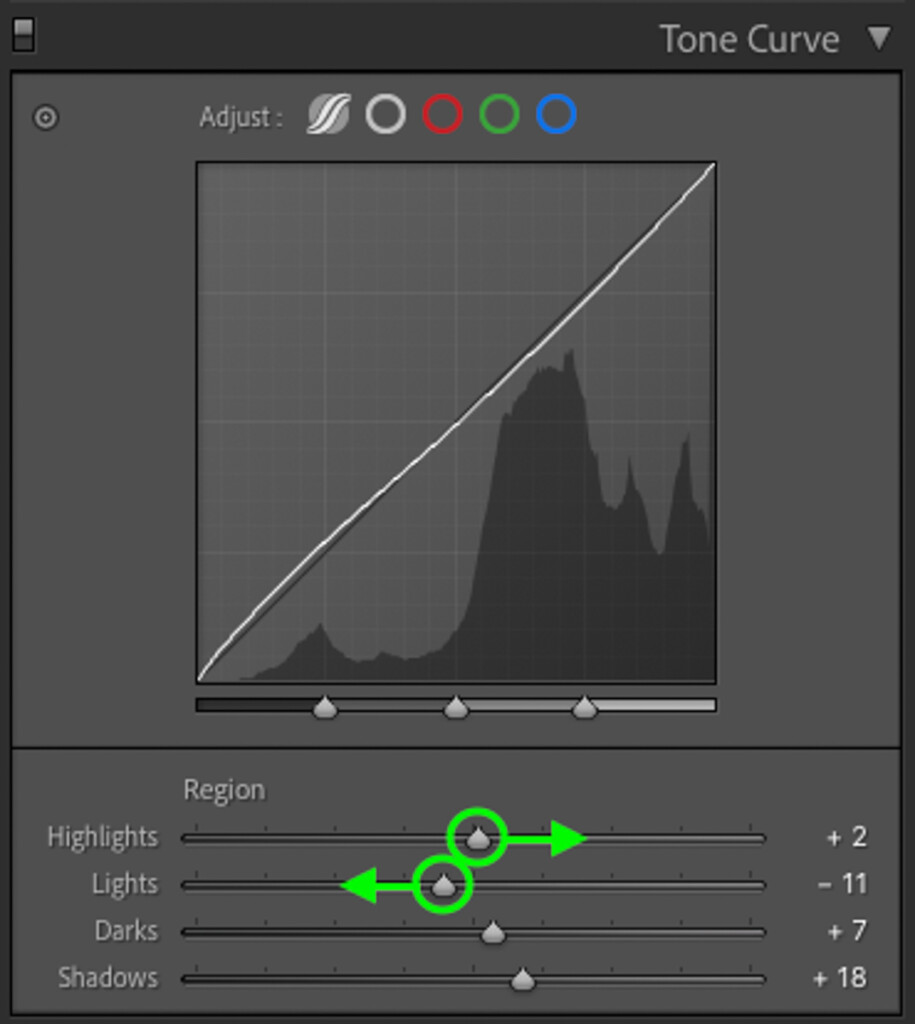
The goal with this adjustment is to improve on the reduced contrast in the edit.
Step 4: Mute The Colors With HSL
Now comes the color adjustments, which can be done easily with the HSL adjustment. To make your photo look like film, you want to mute any dominant colors in the image and favor more teal or green hues. That means you'll mostly work within the hue and saturation adjustments.
Starting with the hue adjustment, click on the color sample and click on any color in the photo. By dragging up or down, you can quickly change the hue of the selected color. In my image, I'll click on the paddle to make it more yellow and then the background to favor a blue hue.
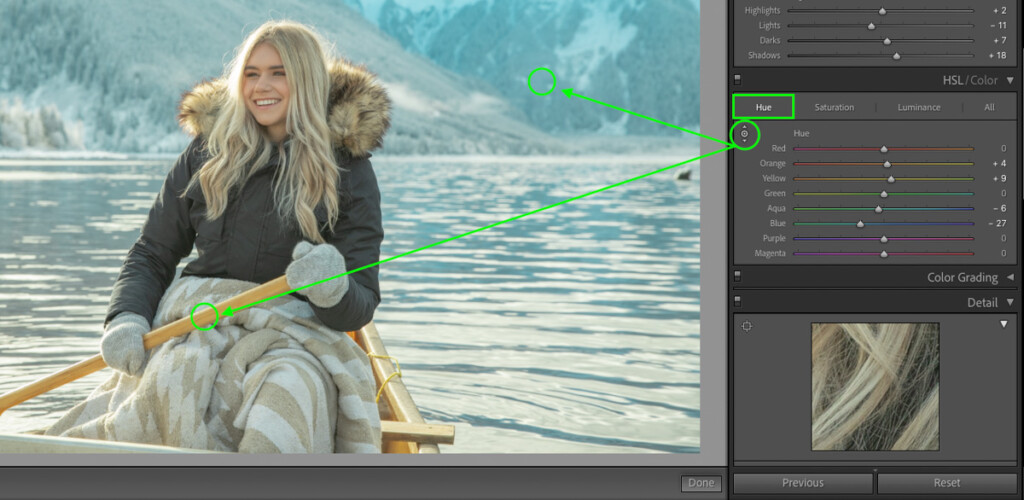
Whatever hue adjustments you make, remember you don't want any crazy colors in the photo. For example, I wouldn't want to make the mountains in the background of my photo look purple or the paddle to look red. This kind of edit can work for other editing styles but doesn't look good for film edits. So try to keep the hues natural and neutral!
Next, click on the saturation adjustment and once again, click on the sample option and click on any color in the photo. This time you'll adjust the saturation rather than the hue when you drag the cursor up or down.
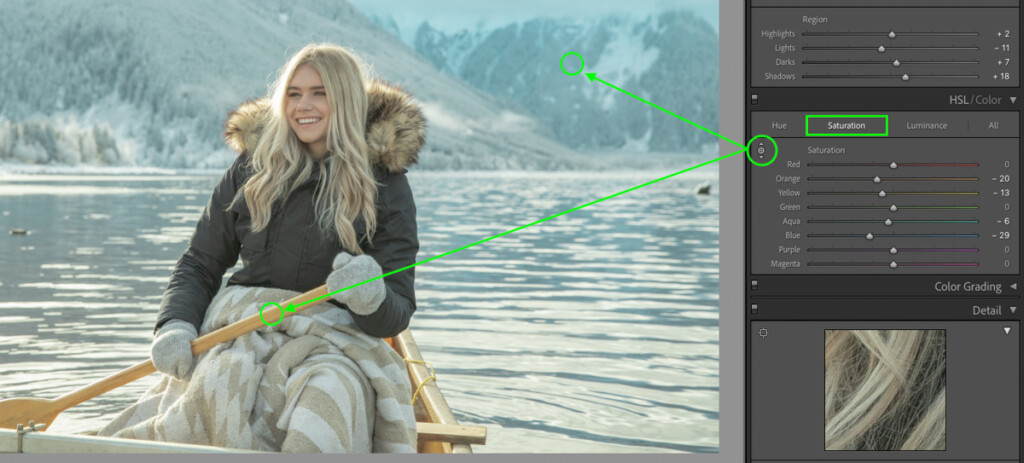
With the saturation adjustment, you want to mute any dominant colors left in your photo. In my photo, the yellow paddle is quite noticeable, so I'll desaturate the yellow slightly. Try desaturating a few parts of your image to see what kinds of looks you get.

Step 5: Add Grain Into The Image
For the final step in the film edit, let's add some grain. Grain is a staple of all film edits and really helps to sell the effect. In Lightroom, it can be easily added via the Grain slider in the Effects panel.
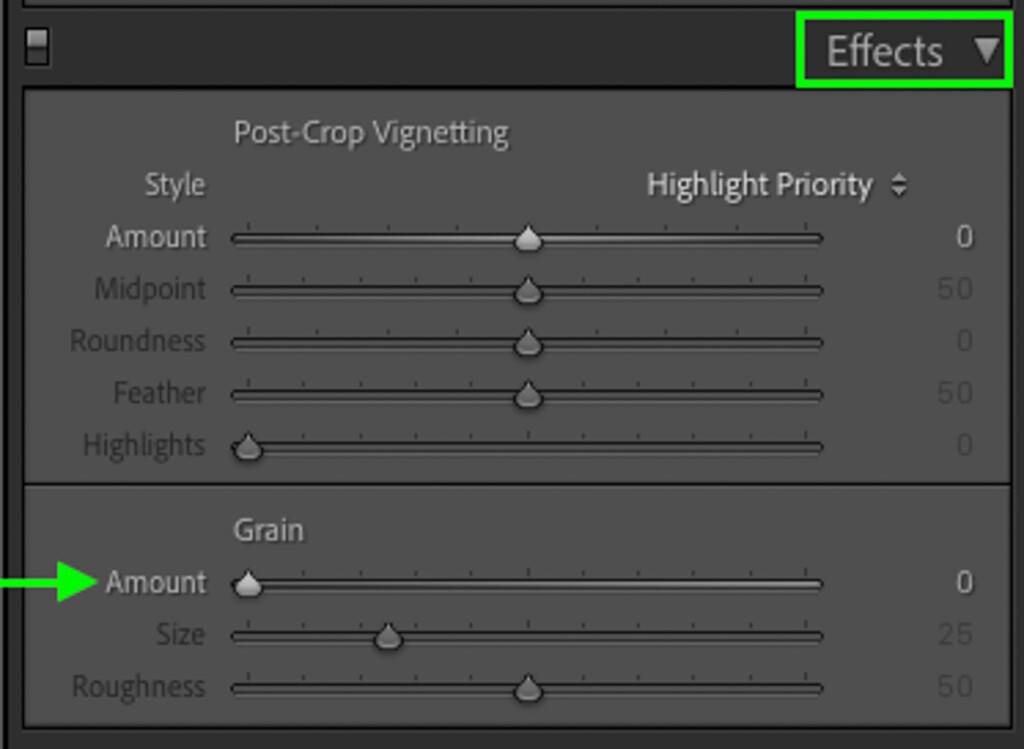
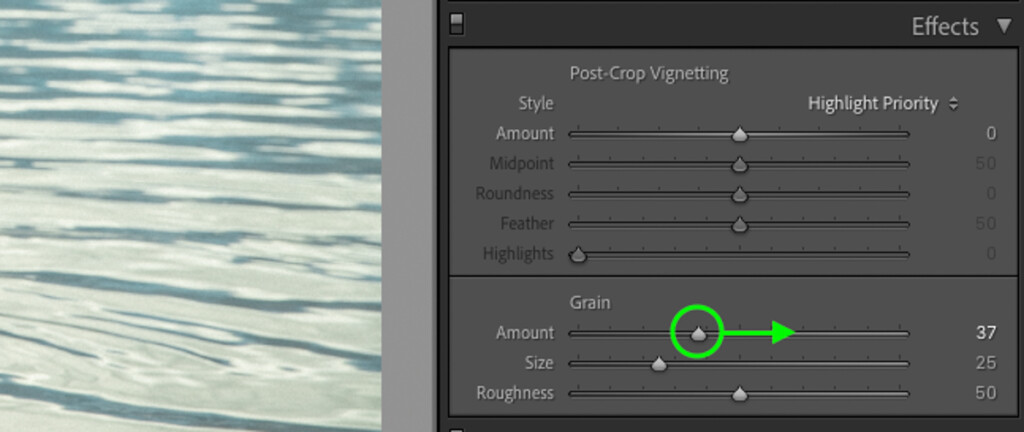
Start by increasing the grain until it becomes barely noticeable in the image. Depending on the shadows and highlights in the image, the right grain amount will vary.
To further enhance the effect, increase the grain's size and roughness to make it more noticeable. Try boosting the size slider just a little while boosting the roughness slider a bit more.
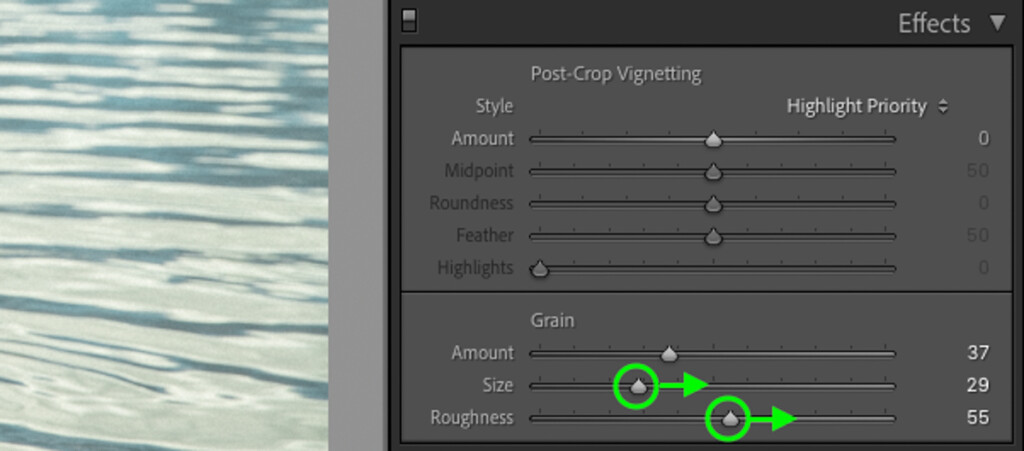
If you don't want the grain to be too noticeable, you can leave the size and roughness adjustments alone.
Now you're left with a realistic film grain over your photo that completes the look of your film edit in Lightroom!
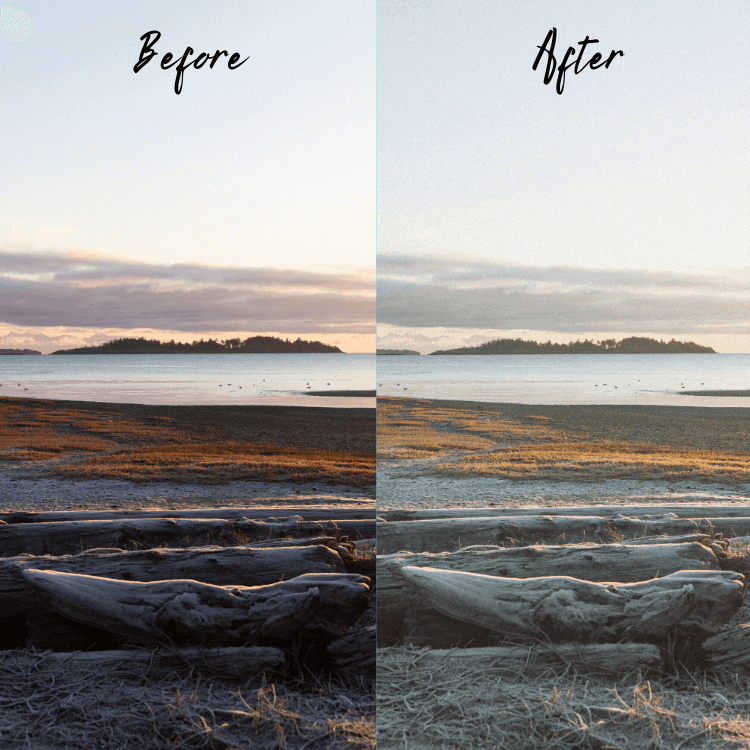
– The Result

-

Before -

After
By softening the shadows, favoring a more warm-green white balance, muting the colors, and adding grain into the image, you've successfully made your photo look like film!
Want To Make This Process Even Faster? Get 25 Vintage Film Presets For One-Click Editing!
Making Photos Look Like Film In Lightroom Mobile
In Lightroom Mobile, there are some slightly different steps to follow to get a film look to your photos. Luckily the process is still straightforward and doesn't require any technical masking or spot adjustments!
To make your photos look like film in Lightroom mobile, use the "Light" Module to boost the darks and shadows in your image. Moving into the "Color" Module, adjust the white balance sliders to favor a more yellow-green hue. You can further enhance your film edit by desaturating any dominant colors via the Color Mix tool or adding grain with the Grain Slider in the "Effect" Module.
Let's go through creating this film look in Lightroom Mobile, step by step.
Step 1: Adjust Contrast With The "Light" Module
Start by clicking on the Light Module and lifting the darks and shadows in your image. These sliders will soften any dark areas in the photo and create a matte look in your image. This is very important for film-like edits in Lightroom Mobile!
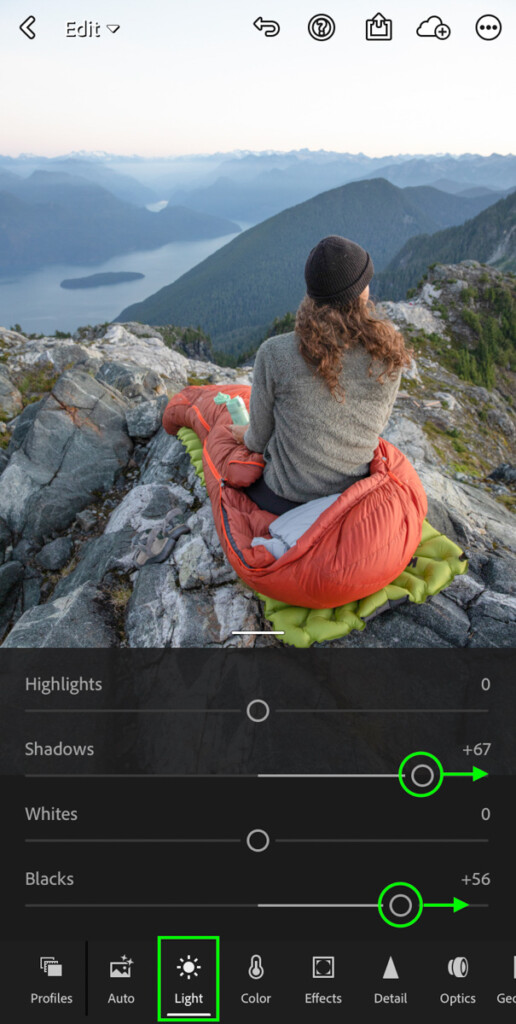
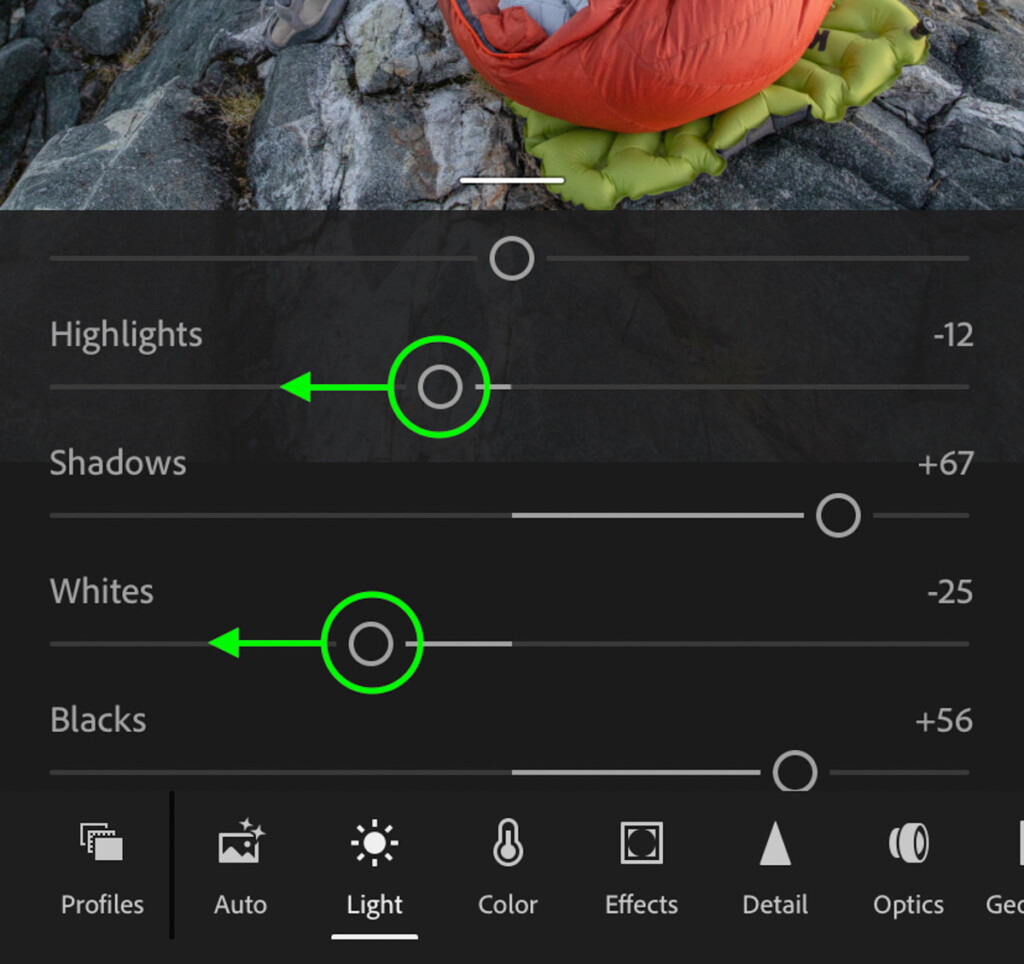
Next, bring down the lights and highlights slider slightly to flatten out the image further.
Like with the previous steps in Lightroom desktop, you can then use the exposure slider to brighten or darken the entire photo if things aren't looking quite right.

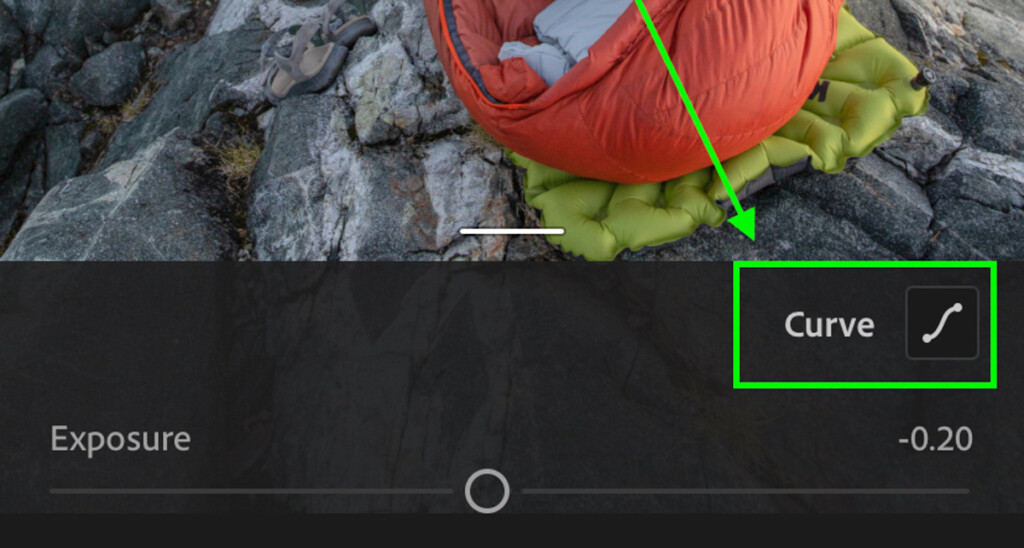
Step 2: Add A Matte Look With The Tone Curve
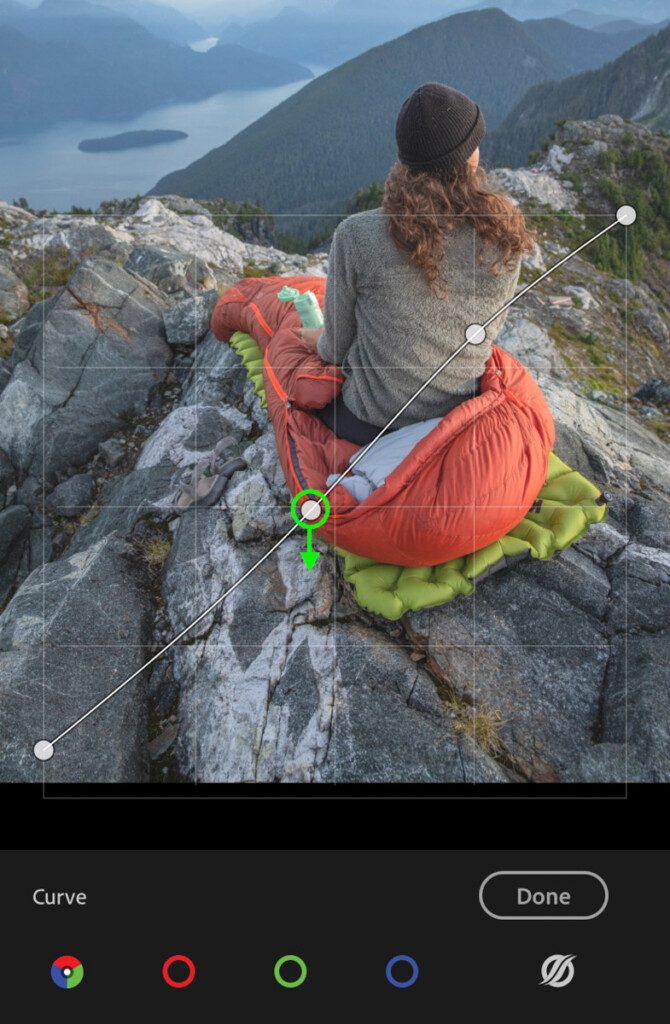
Still inside of the Light Module, click on the Curve adjustment.
Clicking on the shadows anchor point, drag it upwards to add a matte look to the photo. This will help to accentuate the flattened contrast from the previous step.
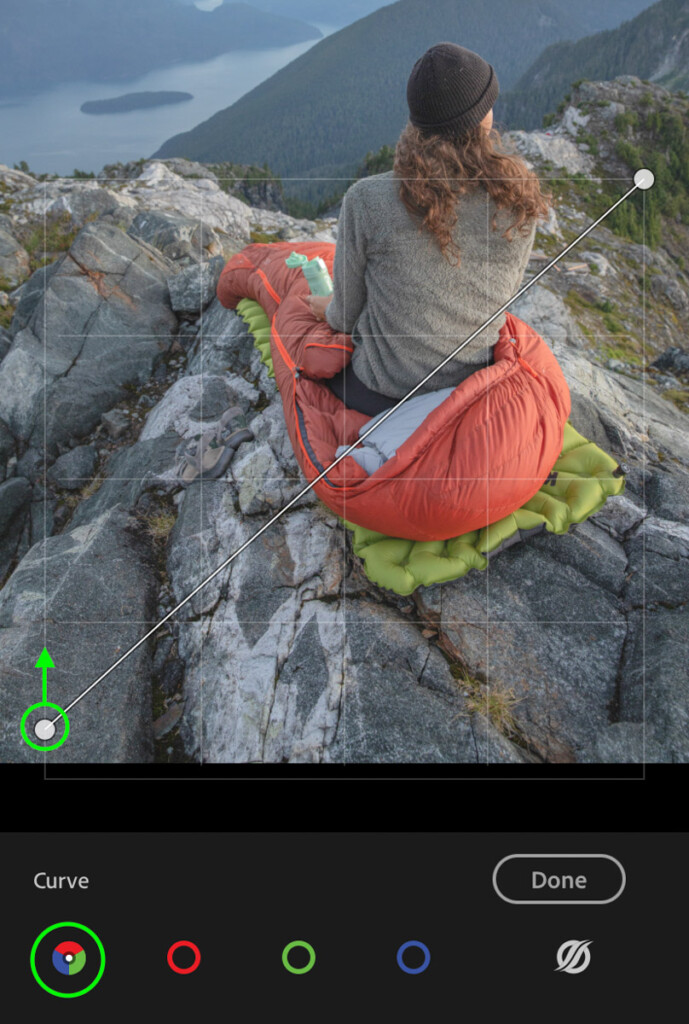
Next, click on the highlights to add an anchor point and drag it up.

Then click on the mid-tones and drag it down to add back a bit of contrast.
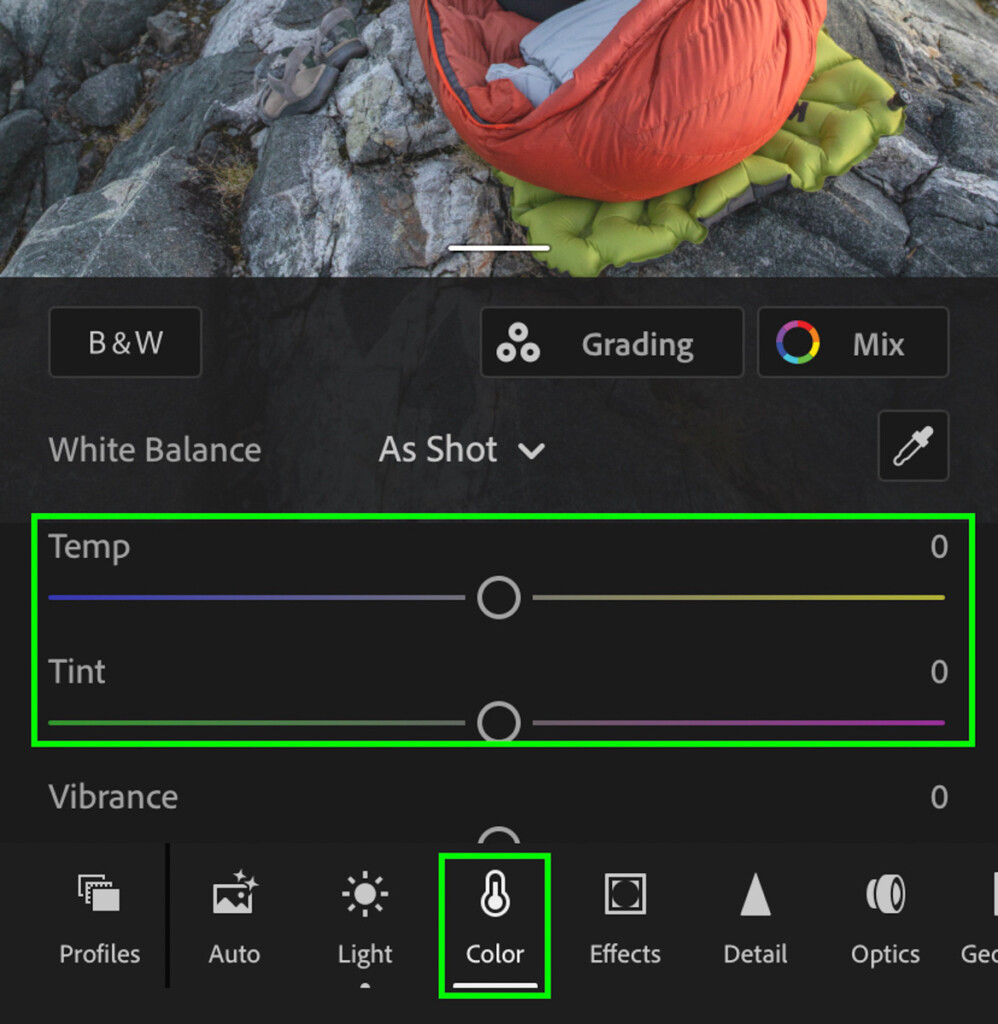
Step 3: Make The White Balance A Warm-Green Hue In The "Color" Module
Now that the contrast adjustments are complete, it's time to switch over to the Color Module.
The first order of business is to adjust the Temp and Tint sliders to favor a yellow-green hue typical of the film aesthetic you see online.
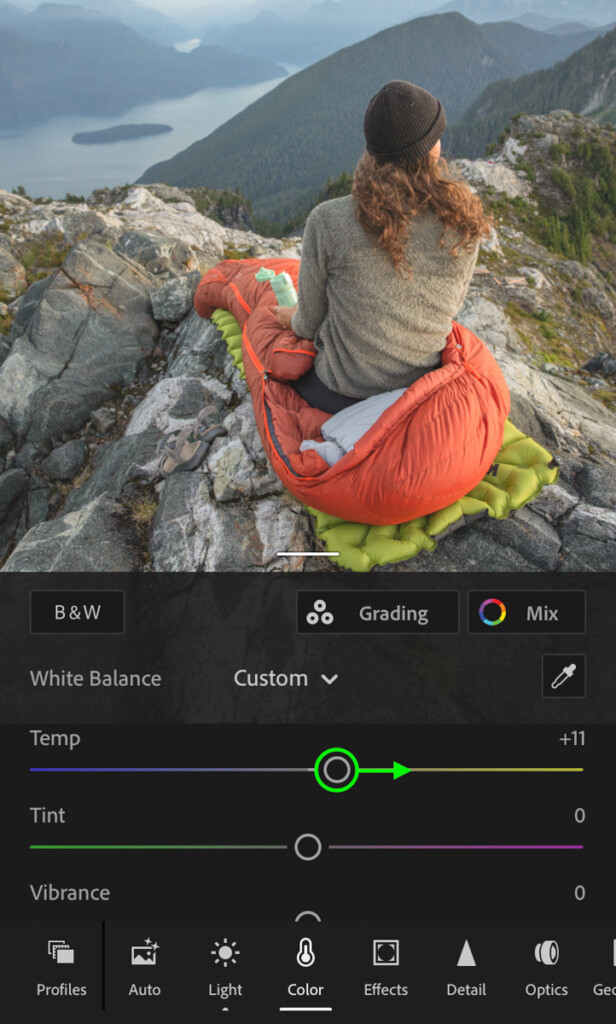
With the Temp slider, drag it right to add more yellow and warm up your image.
Then move the Tint slider left to add more green into your edit.
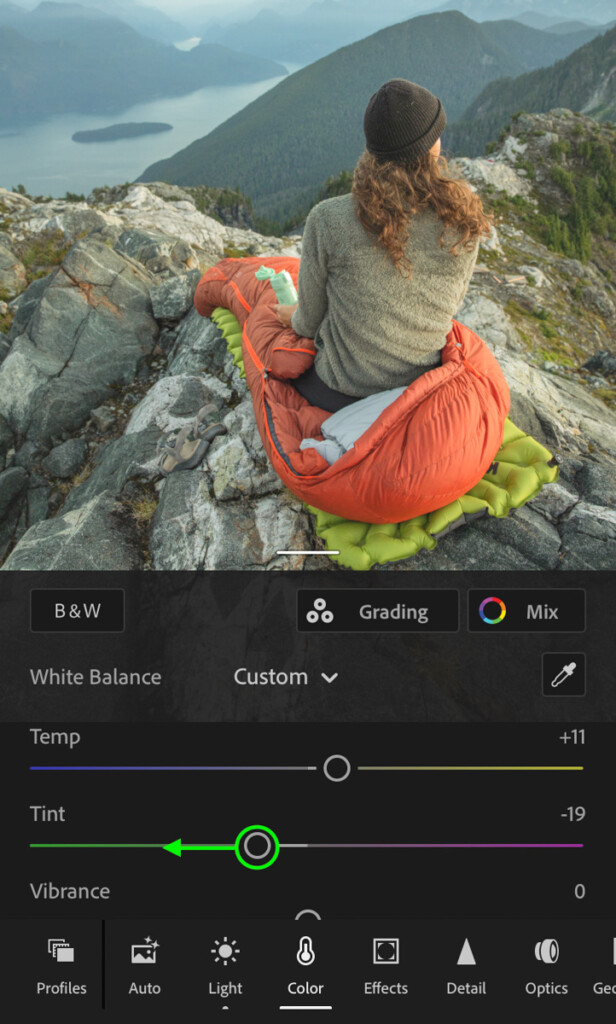
This may take a bit of experimenting, going back and forth until you find a nice white balance for the image. The goal is to make the image look slightly yellow-green without being too overpowering.
Step 4: Mute The Colors With The Color Mix Adjustment
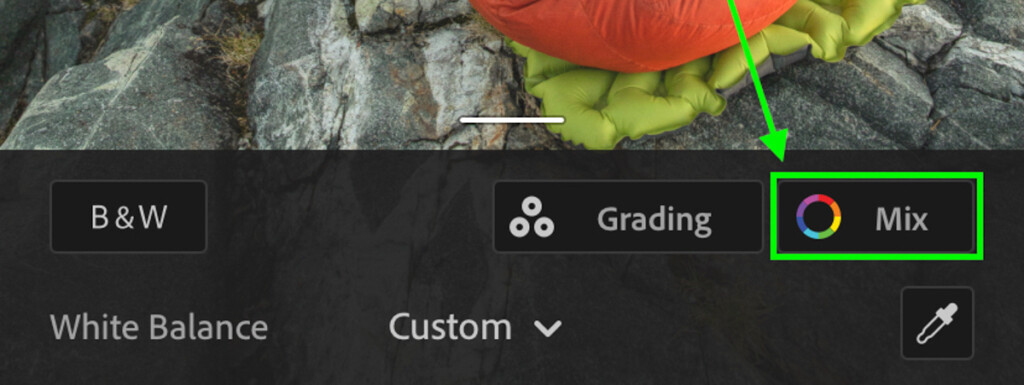
With the white balance adjustment complete, click on the Mix tool. This is essentially the HSL adjustment, just with a different name.
Start by clicking on the sample button and selecting the hue option. Click to sample any dominant color in your photo, and drag your finger up or down to adjust the hue. Make sure that whatever hue adjustments you make favor a natural tone, nothing too vibrant or unrealistic.
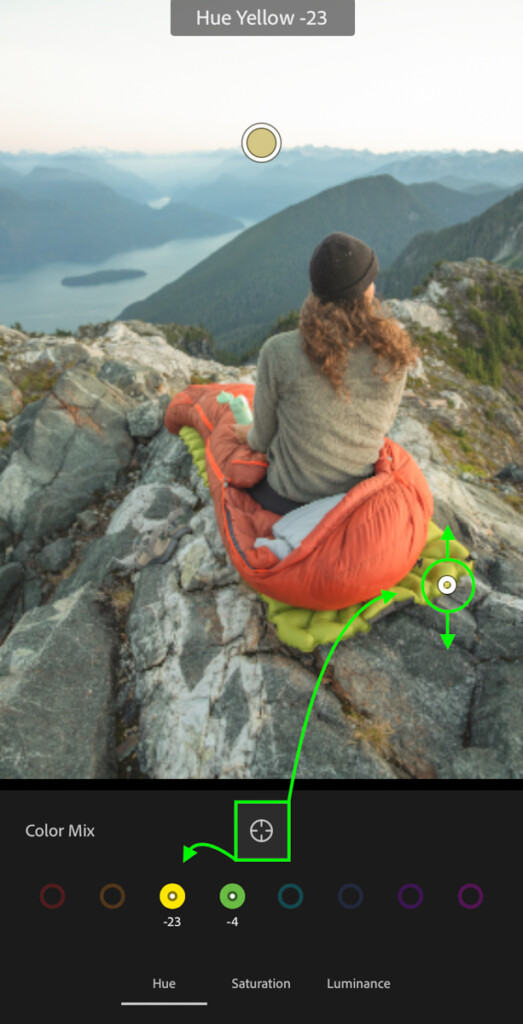
Next, click on the saturation option and repeat the same process. Clicking on any dominant colors in the photo and dragging your finger down, you can desaturate any dominant colors. This helps to give the photo a muted look and enhance the film look we're going for.

Step 5: Add Grain In The Effects Module
To complete your film edit in Lightroom Mobile, you can add some film grain with the Grain slider. To access this slider, select the Effects Module.
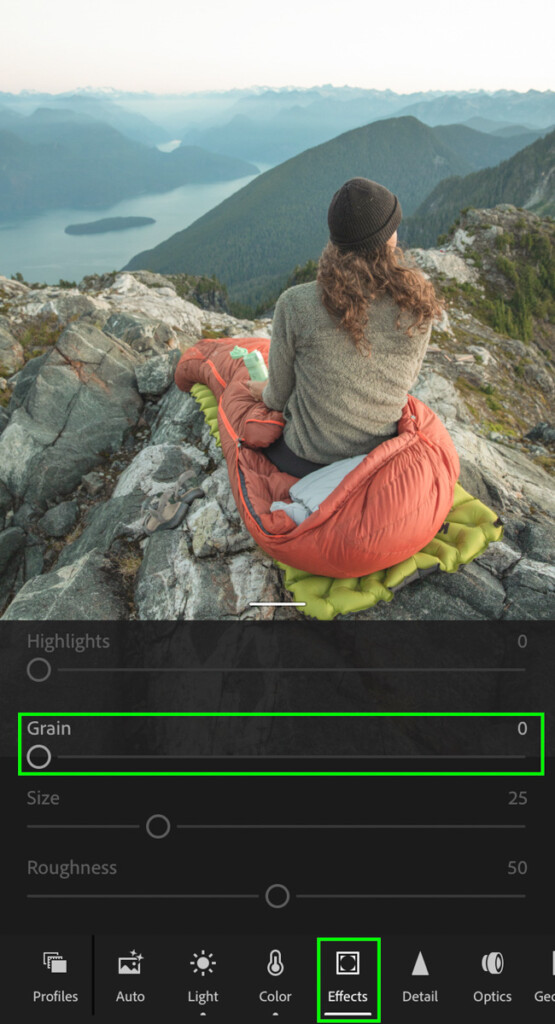
Start by increasing the grain amount until it's slightly visible in the photo.

Then increase the size and roughness sliders to make the edit look more like real film.

– The Result

-
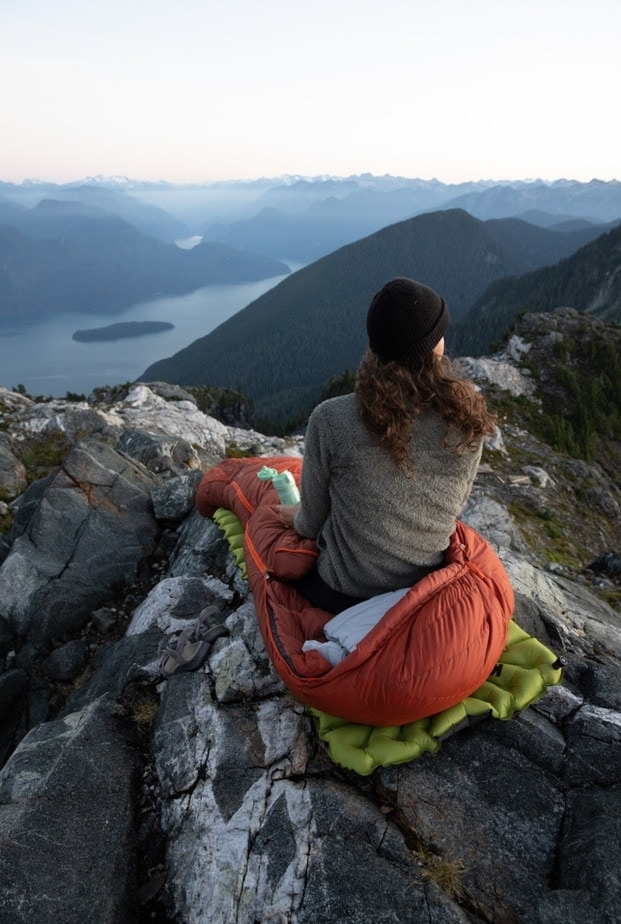
Before -
After
With 5 simple steps, you've now edited your photos to look like film with the help of Lightroom Mobile!
Learning how to edit your photos in this way is a lot of fun and surprisingly easy. Especially if you love that retro film aesthetic, this is a great effect to use with your images. Now you can bask in the glory of filmic style, all while using your digital camera!
How To Edit Photos Like Film With One Click!
Learning how to create this effect can be fun, but there's no doubt that it's super time-consuming. Having to remember all these steps is one thing, but having to repeat the process for all your photos is a huge pain. Luckily there's a way to speed up the process with these 25 Vintage Film Lightroom and Lightroom Mobile Presets!
I created this preset pack to help you spend less time editing and more time sharing your photos. With a single click, you can apply a variety of realistic film styles to any image. Just check out some of the examples below of this preset in action:
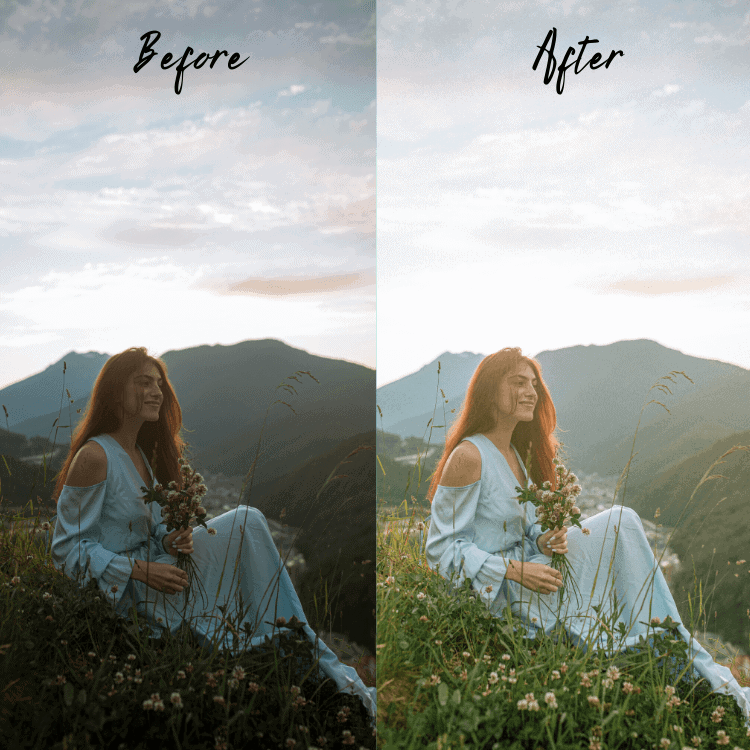
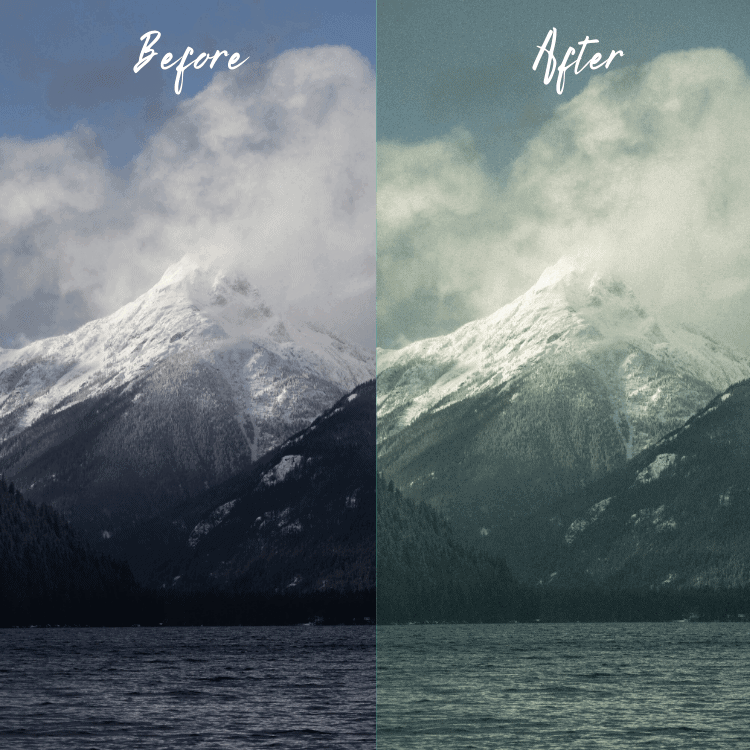
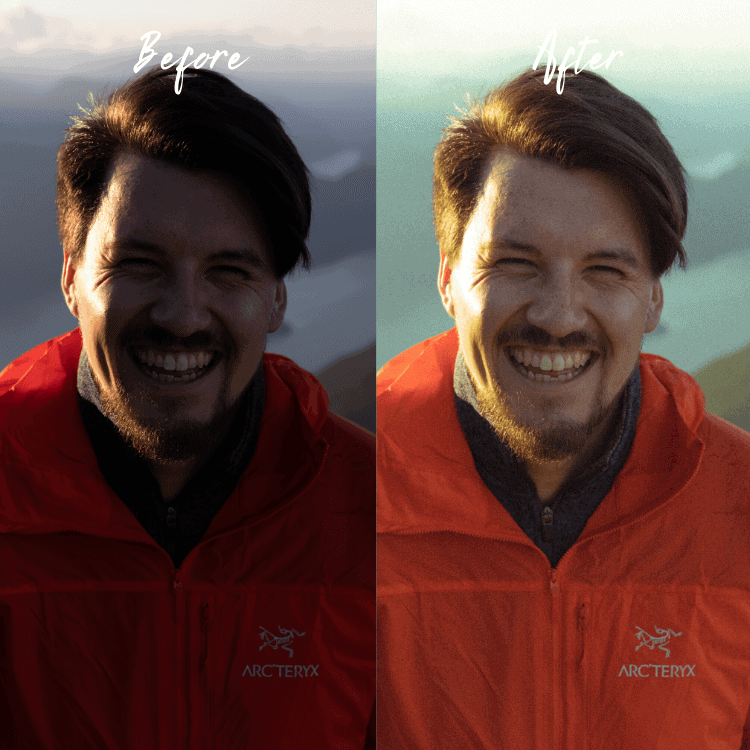
So if you want to edit your photos like film in Lightroom, while saving A TON of time, definitely check out this preset collection to see if it's right for you!
Happy Editing,
– Brendan 🙂
How To Create A Matte Look In Lightroom
Source: https://www.bwillcreative.com/how-to-make-photos-look-like-film-in-lightroom/
Posted by: levinespinat.blogspot.com
0 Response to "How To Create A Matte Look In Lightroom"
Post a Comment